
Do you want to find the missing dimensions in PDF drawings? In this article, you can learn how to find the missing dimension, distance or measurement in pdf drawing using a nitro pro.
Sometimes it happens that the PDF drawing we receive from the Architect, Engineer or Interior Designer does not show some critical Measurements, Dimensions or Distance, so it becomes difficult to understand the drawing to set out or implement the works or calculate the quantity of the materials. And if this all is happening with you, then you should read this whole blog.
Because in this blog, I will show you how to find dimensions, measurements or distance in pdf drawings. In the below-shown drawing, almost all the dimensions are given, but a few important ones are missing, so we will find them out by following a step-by-step procedure as shown below. Before we go, please click on the below download button to see how to download and install Nitro Pro 12 Full Version software, which will help us in this lesson.
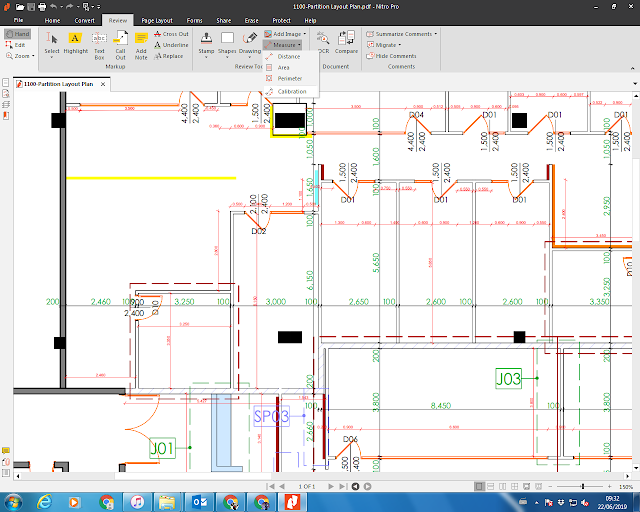
Once you download and install Nitro Pro Software, right-click on the PDF drawing in which you want to find the missing measurement, distance or dimensions; and then go to “Edit with Nitro Pro“. The Nitro Pro will open the PDF Drawing. Once the drawing open, go to Review Tab and click on the measure, and then select Calibration from the measure drop-down list.
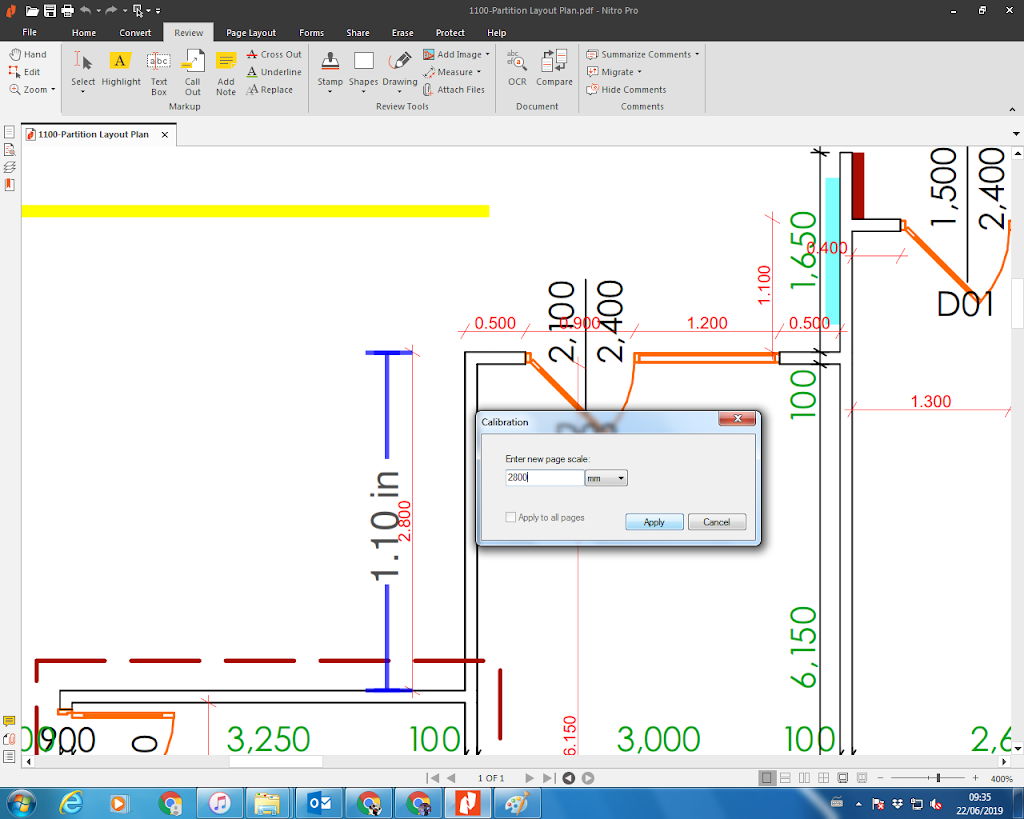
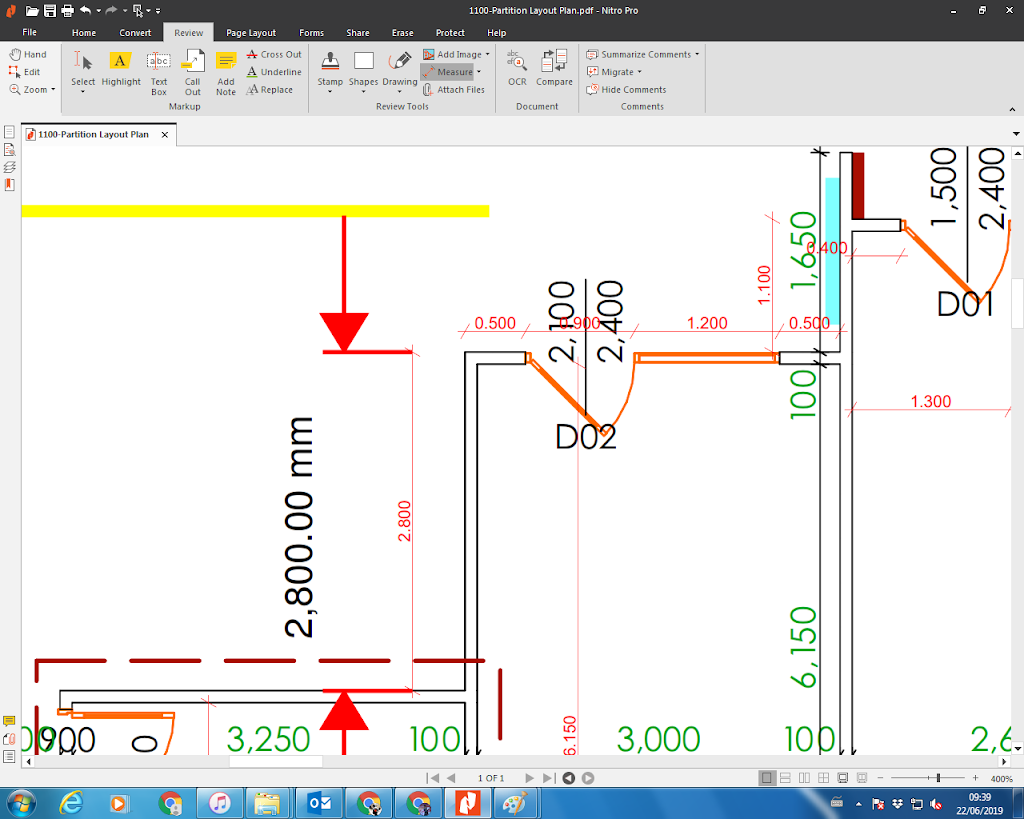
Here you have to calibrate the drawing according to its scale and to calibrate the drawing select medium-size or small size given measurement or dimension. Here I am selecting endpoints of this dimension, you have to be careful while selecting this and have to choose exact endpoints, you can zoom in and zoom out by control key and rotating mouse wheel; once you select the 2nd endpoint, the Calibration dialogue box will open. In the below image you can see, I have chosen two endpoints of 2,800mm dimension, which is showing in 1.10 in and after that the Calibration dialogue box is opened. Now, as the given dimensions are in mm and for Calibration, we have chosen 2,800mm, we will write 2,800 in the calibration dialogue box, and we will select the mm unit from the drop-down list. After that, press on ok and your drawing will get calibrated, and you can find any dimension of this drawing.
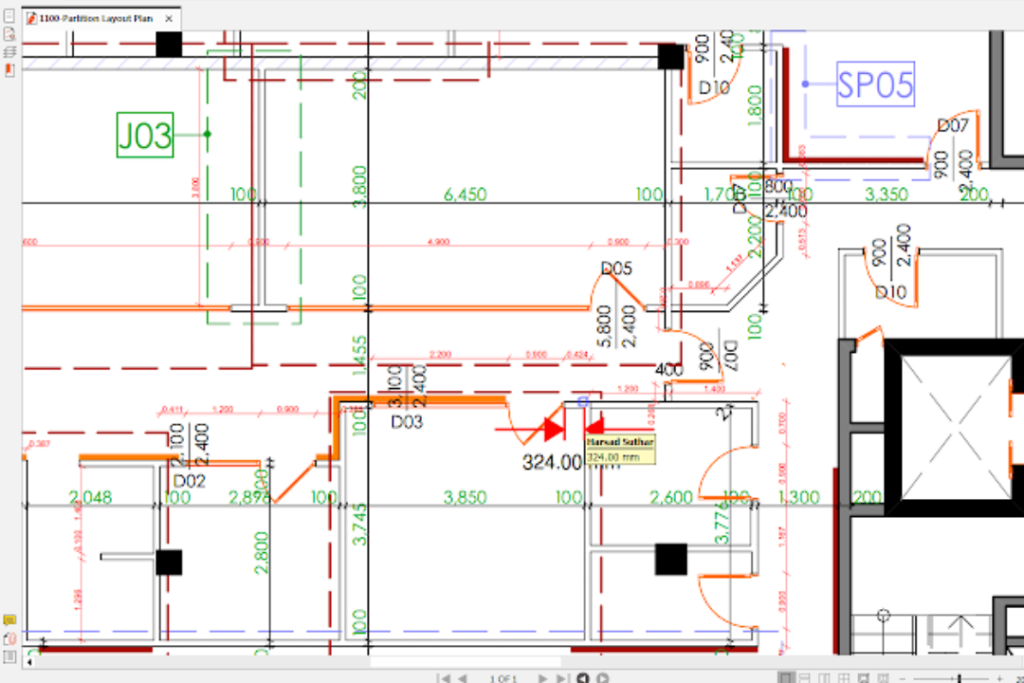
So now we can try to find any portion of the drawing, and I try this wall partition which is not given so now let’s use the dimension option in review tap and then select endpoint of this partition wall to find its dimension, and it is 324.00 mm. You can save the file to keep these dimensions and can also choose, don’t save the file if you want to remove these dimensions.
Please make note that these derived dimensions, measurements or distances are to be confirmed with the relevant authority (Architect, Engineer, Interior designer or the team which has produced and shared the drawing with you).
Thank you so much for your valuable time, you can check out my other videos about Nitro Pro by bellow links. I will see you in the next blog till then you take care and goodbye.